WordPress is an incredibly powerful and flexible platform, but its true potential is unlocked through plugins. While thousands of plugins are available, there are times when you need specific functionality that just isn't covered by existing solutions. This is where learning how to make a WordPress plugin becomes an invaluable skill. Developing your own custom WordPress plugin gives you precise control over your site's features, allowing you to extend its capabilities without modifying core files or risking theme updates breaking your custom code.
This comprehensive guide will walk you through everything you need to know to create a WordPress plugin, from understanding the foundational concepts to mastering essential development practices and ensuring security. Whether you're a beginner looking to add simple customizations or an aspiring developer aiming to build complex solutions, you'll find the knowledge you need here to successfully develop a WordPress plugin.
Why Make a Custom WordPress Plugin?
You might wonder why you should invest time in learning to build a WordPress plugin when there's such a vast ecosystem of ready-made options. The benefits are numerous:
- Tailored Functionality: Get exactly the features you need, without unnecessary bloat.
- Improved Performance: Code only what's required, leading to leaner, faster websites compared to feature-heavy, generic plugins.
- Enhanced Security: Maintain full control over your codebase, reducing reliance on third-party security practices.
- Portability: Easily move functionality between different themes or even other WordPress installations without re-coding.
- Deep Customization: Implement complex integrations or unique user experiences that off-the-shelf plugins simply cannot provide.
- Professional Growth: Sharpen your PHP, HTML, CSS, and JavaScript skills within the WordPress environment.
- Monetization Opportunities: Develop and potentially sell your own premium plugins or offer custom plugin development services.
What You'll Need Before You Start to Build a WordPress Plugin
To successfully embark on your journey to make a WordPress plugin, some foundational knowledge and tools will be essential:
- Local Development Environment: A setup like XAMPP, MAMP, Local by Flywheel, or Docker allows you to develop and test your plugin without affecting a live site.
- Basic PHP Knowledge: WordPress is primarily built on PHP, so a fundamental understanding of its syntax, functions, and object-oriented programming (OOP) concepts is crucial.
- HTML & CSS Basics: For structuring content and styling any front-end or admin-facing elements your plugin might introduce.
- Familiarity with WordPress Core: Understanding how WordPress works (posts, pages, custom post types, the database, user roles, etc.) will make the development process much smoother.
- A Reliable Code Editor: Tools like VS Code, Sublime Text, PhpStorm, or Atom provide features like syntax highlighting, code completion, and debugging support.
- Access to the WordPress Codex/Developer Resources: The official WordPress documentation is an invaluable resource for hooks, functions, and best practices.
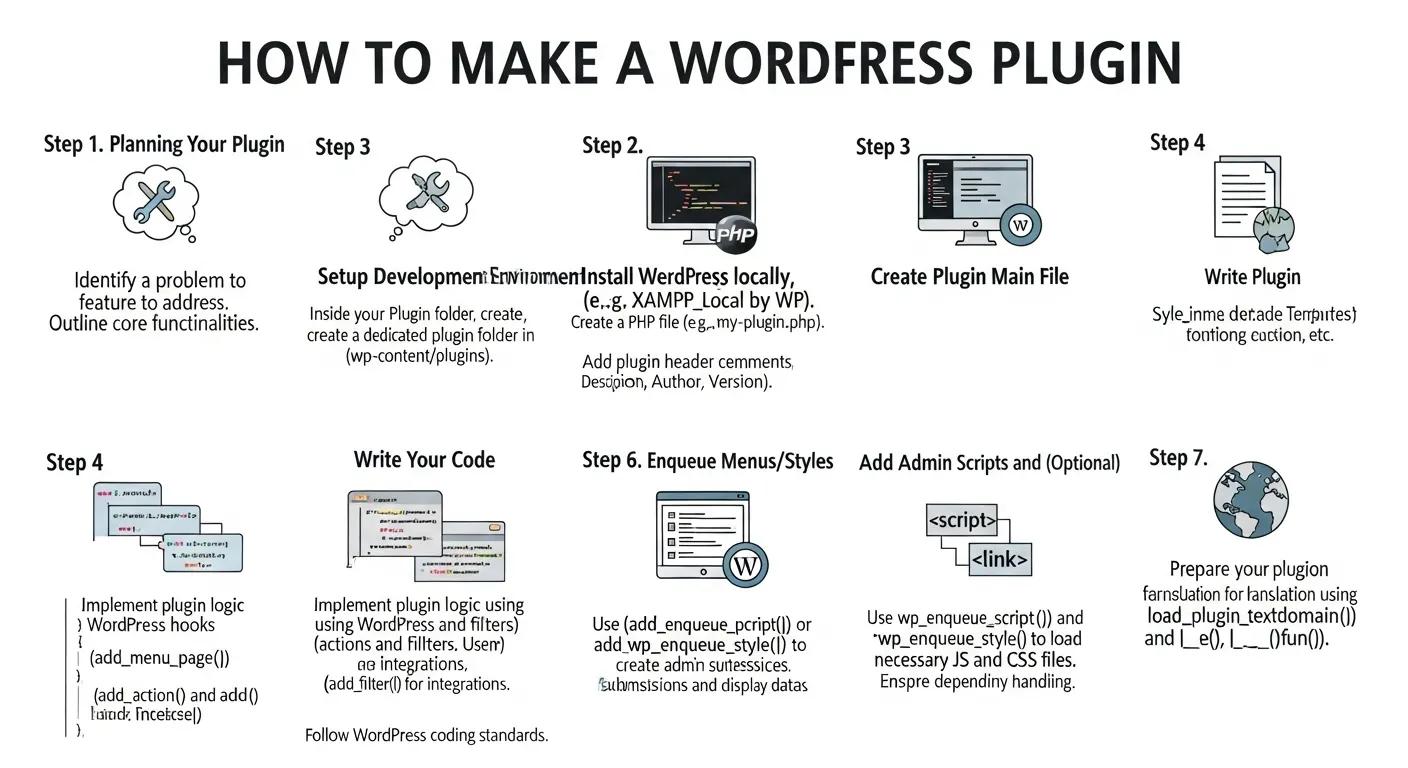
Understanding the Core WordPress Plugin Structure
Every WordPress plugin begins with a main PHP file containing specific header comments that identify it to WordPress. Let's outline the basic steps to set up your first custom WordPress plugin:
- Create a Plugin Folder: Navigate to your WordPress installation's
wp-content/plugins/directory. Create a new folder here for your plugin. Choose a unique, descriptive, and lowercase name, e.g.,my-first-plugin. - Create the Main Plugin File: Inside this new folder, create a PHP file. By convention, this file often shares the same name as your plugin folder, e.g.,
my-first-plugin.php. This is the file WordPress will look for to identify your plugin. - Add the Plugin Header: This is the most critical step for WordPress to recognize your plugin. Add the following commented block at the very top of your main plugin file.
<?php

\*

Plugin Name: My First Awesome Plugin

Plugin URI: https://www.example.com/my-first-plugin-page/

Description: A simple plugin to demonstrate WordPress plugin development.

Version: 1.0.0

Author: Your Name

Author URI: https://www.example.com/your-website/

License: GPL2

License URI: https://www.gnu.org/licenses/gpl-2.0.html

Text Domain: my-first-plugin

Domain Path: /languages

*/


// --- Your plugin's core code will go here ---
Explanation of Header Fields:
- Plugin Name: The name displayed in the WordPress admin plugin list.
- Plugin URI: The public-facing URL of your plugin (e.g., its page on your website).
- Description: A brief description of what your plugin does.
- Version: The current version number of your plugin.
- Author: Your name or company name.
- Author URI: Your website or company's website.
- License & License URI: The license under which your plugin is distributed (GPL2 is common for WordPress plugins).
- Text Domain & Domain Path: Essential for internationalization (making your plugin translatable).
Once you've saved this file with the header, refresh your WordPress admin dashboard and navigate to "Plugins" > "Installed Plugins." You should now see "My First Awesome Plugin" listed. You can activate it, though it won't do anything yet!
The Heart of WordPress Plugins: Actions and Filters (Hooks)
The true power in knowing how to make a WordPress plugin comes from mastering WordPress Hooks. These are pre-defined points in the WordPress core where you can "hook" your custom code, either to perform an action or modify data. Hooks are divided into two types: Actions and Filters.
Actions: Executing Code at Specific Points
Actions allow you to execute custom functions when a specific event occurs in WordPress. This could be anything from saving a post to loading the admin panel or displaying the footer.
<?php

// Function to add a custom message to the admin footer

function mfp_custom_admin_footer_message() {

echo '<p><em>Thanks for using My First Awesome Plugin!</em></p>';

}

// Hook into the 'admin_footer_text' action to run our function

add_action( 'admin_footer_text', 'mfp_custom_admin_footer_message' );

In this example, `admin_footer_text` is the action hook, and `mfp_custom_admin_footer_message` is the callback function that will be executed when WordPress triggers this hook. The prefix \`mfp_\` (My First Plugin) is a good practice to avoid function name collisions with other plugins or themes.

### Filters: Modifying Data

Filters allow you to modify data before WordPress uses or displays it. This is useful for altering post content, changing titles, manipulating URLs, or transforming other pieces of information.

<?php

// Function to append a custom message to all post content

function mfp_custom_content_append( $content ) {

// Check if we are on a single post page to avoid appending everywhere

if ( is_single() && ! is_admin() ) {

$content .= '<p><strong>This content was proudly enhanced by My First Awesome Plugin!</strong></p>';

}

return $content; // CRITICAL: Always return the filtered content!

}

// Hook into 'the_content' filter to modify post content

add_filter( 'the_content', 'mfp_custom_content_append' );
Here, the_content is the filter hook. Your function mfp_custom_content_append receives the original post content ($content), modifies it, and then returns the modified content. Remember, with filters, you must return the first argument, or your changes won't take effect.
See Master 5 Essential WordPress Hooks: Actions & Filters Explained our comprehensive guide where I dive deep into actions and filters.
Building Essential WordPress Plugin Features
Enqueuing Scripts and Styles Safely
If your plugin needs custom JavaScript or CSS, always enqueue them using WordPress's dedicated functions to ensure they load correctly, avoid conflicts, and maintain optimal performance.
<?php

function mfp_enqueue_assets() {

// Enqueue Custom CSS

wp_enqueue_style( 'mfp-style', plugins_url( 'css/my-plugin-style.css', __FILE__ ), array(), '1.0.0', 'all' );


// Enqueue Custom JavaScript

// The third argument is an array of dependencies (e.g., 'jquery')

// The fifth argument (true) makes the script load in the footer

wp_enqueue_script( 'mfp-script', plugins_url( 'js/my-plugin-script.js', __FILE__ ), array( 'jquery' ), '1.0.0', true );


// Pass PHP variables to JavaScript (important for AJAX)

wp_localize_script( 'mfp-script', 'mfp_ajax_object', array(

'ajax_url' => admin_url( 'admin-ajax.php' ),

'nonce' => wp_create_nonce( 'mfp_ajax_nonce' )

) );

}

// Action hook for front-end scripts

add_action( 'wp_enqueue_scripts', 'mfp_enqueue_assets' );

// Action hook for admin-end scripts (if your plugin has an admin interface)

add_action( 'admin_enqueue_scripts', 'mfp_enqueue_assets' );
Remember to create the `css` and `js` folders within your plugin directory and place your respective files there.
See WordPress Data Sanitization & Escaping Guide 2026 our complete guide where sanitizing data in WordPress is explained in depth.
Creating Admin Pages for Settings
Many plugins require a user interface in the WordPress admin panel for configuration. You can add new top-level or sub-menu pages easily:
<?php

function mfp_admin_menu() {

// Add a top-level menu page

add_menu_page(

'My First Plugin Settings', // Page title

'First Plugin', // Menu title

'manage_options', // Capability required to access

'my-first-plugin', // Menu slug (must be unique)

'mfp_render_settings_page', // Callback function to render the page content

'dashicons-star-filled', // Icon URL or Dashicon class

100 // Position in the menu

);

// You can also add sub-menu pages using add_submenu_page()

}

add_action( 'admin_menu', 'mfp_admin_menu' );


function mfp_render_settings_page() {

// Check if the current user has the 'manage_options' capability

if ( ! current_user_can( 'manage_options' ) ) {

return; // Stop execution if user doesn't have permissions

}

// Render the HTML for your settings page

echo '<div class="wrap">';

echo '<h1>' . esc_html( get_admin_page_title() ) . '</h1>'; // Page title

echo '<p>Welcome to My First Awesome Plugin\\'s settings page!</p>';

// Here you would add your form elements, settings fields, etc.

echo '</div>';

}
Handling Plugin Activation and Deactivation
You often need to perform specific actions when your plugin is activated (e.g., create database tables, set default options) or deactivated (e.g., clean up temporary data). This is done using activation and deactivation hooks.
<?php

// Activation Hook

function mfp_plugin_activate() {

// This code runs ONLY when the plugin is activated

// Example: Create a custom database table

global $wpdb;

$table_name = $wpdb->prefix . 'mfp_custom_data'; // Using prefix for security and uniqueness

$charset_collate = $wpdb->get_charset_collate();


$sql = "CREATE TABLE $table_name (

id bigint(20) NOT NULL AUTO_INCREMENT,

item_name tinytext NOT NULL,

item_description text NOT NULL,

created_at datetime DEFAULT CURRENT_TIMESTAMP NOT NULL,

PRIMARY KEY (id)

) $charset_collate;";


require_once( ABSPATH . 'wp-admin/includes/upgrade.php' );

dbDelta( $sql ); // WordPress function to create/update database tables


// Set a default option

add_option( 'mfp_default_setting', 'default_value' );

}

register_activation_hook( __FILE__, 'mfp_plugin_activate' );


// Deactivation Hook

function mfp_plugin_deactivate() {

// This code runs ONLY when the plugin is deactivated

// Example: Delete temporary options or clear caches

delete_option( 'mfp_default_setting' );

// Note: It's generally NOT recommended to delete database tables on deactivation,

// as users might just temporarily deactivate and re-activate.

// Deletion is usually reserved for uninstall hooks.

}

register_deactivation_hook( __FILE__, 'mfp_plugin_deactivate' );
Security Best Practices for WordPress Plugin Development
When you make a WordPress plugin, security must be your paramount concern. A poorly coded plugin can introduce severe vulnerabilities to your website. Always adhere to these best practices:
- Sanitize and Validate User Input:Sanitize: Clean user input before saving it to the database or displaying it. Use functions like
sanitize_text_field(),esc_url_raw(),absint(), orwp_kses()for richer content. - Validate: Ensure input conforms to expected formats (e.g.,
is_email(),is_numeric()). If validation fails, reject the input or provide an error. - Escape All Output: Before displaying any data (especially user-generated or external data) on the front-end or in the admin area, always escape it. Use functions like
esc_html()for HTML content,esc_attr()for HTML attributes,esc_url()for URLs, andwp_kses_post()for post content. This prevents Cross-Site Scripting (XSS) attacks. - Use Nonces (Number Once): Implement nonces for all forms, AJAX requests, and URL-based actions to protect against Cross-Site Request Forgery (CSRF) attacks. Use
wp_nonce_field()in forms andcheck_admin_referer()orwp_verify_nonce()for verification. - Check User Capabilities: Always verify if a user has the necessary permissions (e.g.,
current_user_can('manage_options'),current_user_can('edit_posts')) before allowing them to perform actions or access sensitive information. - Avoid Direct Database Queries: Whenever possible, use WordPress's built-in functions (e.g.,
WP_Query,wp_insert_post(),update_post_meta()) and the$wpdbclass methods (like$wpdb->prepare()for parameterized queries) instead of raw SQL. This helps prevent SQL injection vulnerabilities. - Define Constants: Use `defined('ABSPATH') || die;` at the top of your plugin files to prevent direct access to PHP files.
- Follow WordPress Coding Standards: Adhering to the official WordPress PHP Coding Standards improves readability, maintainability, and often implicitly promotes more secure coding patterns.
Debugging and Testing Your WordPress Plugin
Even the most experienced developers introduce bugs. Effective debugging and thorough testing are vital steps in any plugin development cycle.
- Enable WP_DEBUG: In your
wp-config.phpfile, setdefine('WP_DEBUG', true);to display PHP errors, warnings, and notices. For production, ensure this is set tofalse. - Use
**WP_DEBUG_LOG**: AlongsideWP_DEBUG, setdefine('WP_DEBUG_LOG', true);to save errors to adebug.logfile inside yourwp-contentdirectory, preventing them from being publicly displayed. - Leverage a Debugger: Tools like Xdebug (with an IDE like PhpStorm or VS Code) provide powerful capabilities for stepping through your code, inspecting variables, and identifying the root cause of issues.
- Log Messages: Use PHP's
error_log()or WordPress's `wp_debug_log()` to write custom messages to the debug log file. - Test Across Environments: Test your plugin with different themes, other popular plugins, various PHP versions, and different user roles to ensure compatibility and robustness.
- Unit Testing: For larger, more complex plugins, consider implementing unit tests using tools like PHPUnit to automate testing of individual code components.
Taking Your Plugin Further: Advanced Development Topics
Once you've grasped the fundamentals of how to make a WordPress plugin, you might want to explore these advanced topics to create even more powerful and sophisticated solutions:
- Custom Post Types (CPTs) & Taxonomies: Create entirely new content types (e.g., "Movies," "Products," "Events") and categorization systems for them.
- Meta Boxes & Custom Fields: Add custom input fields to posts, pages, or CPTs for storing additional data.
- Shortcodes: Allow users to embed dynamic content or functionality anywhere on their site using simple tags like
[my_custom_shortcode]. - AJAX in WordPress: Build interactive features that communicate with the server without requiring a full page reload, enhancing user experience.
- WordPress REST API Endpoints: Extend the WordPress REST API to expose your plugin's data and functionality to external applications or front-end frameworks.
- Internationalization (i18n): Make your plugin translatable into different languages using functions like
__(), _e(), _n()and generating .pot files. - Object-Oriented Programming (OOP): Structure larger plugins using classes and objects for better organization, maintainability, and scalability.
- Plugin Settings API: Utilize WordPress's built-in Settings API to manage and save plugin options securely and efficiently.
Conclusion: Empowering Your WordPress Site with Custom Plugins
Learning how to make a WordPress plugin is an incredibly empowering journey that unlocks the full potential of your WordPress site. It allows you to move beyond the limitations of off-the-shelf solutions, giving you the freedom to craft precise functionalities, optimize performance, and create truly unique digital experiences. While the path from a basic concept to a fully functional, secure, and robust plugin requires dedication and continuous learning, the core principles discussed in this guide will serve as a solid foundation.
Start small, experiment with simple functionalities, and gradually expand your knowledge. Remember to prioritize security, follow best practices, and thoroughly test your creations. With each custom WordPress plugin you develop, you'll gain invaluable skills and confidence, transforming your WordPress sites into exactly what you need them to be. Happy coding!
WordPress help that converts
Need a real WordPress expert, not another plugin roulette session?
This post is in WordPress, so here’s the most relevant next step if you want help applying it.
From speed fixes and malware cleanup to custom themes and conversion improvements, we help WordPress sites perform like they were built on purpose.
- Custom WordPress development and troubleshooting
- Performance, security, and technical SEO improvements
- Direct help from an experienced WordPress developer
📧 Want to Stay Updated?
Get the latest web development tips and insights delivered to your inbox.
🚀 What Services do you Offer?
About the Author

Brian Keary
Founder & Lead Developer
Brian is the founder of BKThemes with over 20 years of experience in web development. He specializes in WordPress, Shopify, and SEO optimization. A proud alumnus of the University of Wisconsin-Green Bay, Brian has been creating exceptional digital solutions since 2003.
Expertise
Writing since 2003